Sep 20, 2010

Shooting Food On Location– With a Twist

by Don Giannatti
All images by Don Giannatti


My client called and needed a job turned around right away. Her client needed their entire menu shot for some collateral and web materials and the previous shooter had not been able to do what they needed.

The images had to be attractive enough for menu use, arty enough for the web and collateral and still stay within budget. Well, yeah… there’s always that budget thing. The twist was that we had to do two shots of each dish… one for the menu and one for a more ‘artistic’ collateral piece.

Because of the nature of the food, it was best to do it at one of their locations and luckily enough it was near where I live. I took an afternoon and scouted the store. I wanted to check surfaces since they insisted on using their table surfaces for the shoot. In this case there were several tables that were nearly pristine.

There was also a huge window near a corner of the restaurant that faced east. This window was under a walking area that was covered. At 9 pm the light would stop flowing into the restaurant and we would have soft window light for most of the day.

I decided that we would do the two setups at the restaurant. One for the ‘menu’ type shots and one for the more ‘artsy’ shots as they were described to me.
Gear:
Norman Pack
2 heads
Boom
3 stands
Small softbox
Assorted reflectors
Assorted mirrors
Small sheets of shiny white paper (for cutting into small reflectors)
Gaffer’s tape
Camera Bag
Lighting Bag
Tripod

We began by setting up the small softbox on the boom and positioning it above and slightly behind the table where the food would be setup. I made sure it was close enough to the kitchen area so we could be quick in getting those shots styled. (You can see a diagram of the light setups farther down the page.

I added a medium sized white fill card to the immediate left of the shot. I let the right side go without any fill so there would be some direction to the light. Even if it was a small amount of fall off, it would let the ingredients have a dimension to them as well as keeping the bowl with a slightly darker side.

Below is a shot we did for the “menu” part of the shoot. It is a dish with some of the ingredients surrounding it for a still life look.


The softbox gives a soft, slightly back light. In front of the set I placed a small white reflector to keep the shadows at bay. It is about 10 inches in front of the set and below camera. Without that reflector, the shadows would be extremely contrasty toward the front.

By keeping the light on a boom, it was also easy for two people to style the images. We had to do the whole menu in one and a half days, so there wasn’t a lot of time.

We placed the bowl in position and then brought the ingredients all around it. I had a staging area for the ingredients and would have the manager get the things needed for each dish ready before it came out. We then were able to move that small amount of things on to the set. I styled it with a classical approach of ‘hero’ and supporters.

Even though I had a tripod for the shoot, I ended up shooting hand held. It was very important to end up with the bowls at about the same perspective and size and that meant moving quickly. After the first couple of shots, I put the tripod away.

For the more artistic of the shots we moved the set over to a table by the window. The tables here had rounded ends, so that gave me some added tonality. Below is the same dish in the second location.


Here I used an 80-200MM L lens at wide open (and long) to shorten the depth of field and make the image more ‘fresh.’ I was using the ambient light from the window and the shutter speed was a little low for my taste. I broke out the tripod for these shots. I had enough room to move the camera around quickly on the tripod so it worked out pretty well. We eventually did some considerable work in post on these… adding text and such.

Coming from a low angle I could get some back light and sculpt the food. I also tilted the horizon and and added fill cards for the contrast. Opening the shadows was important, but it couldn’t be so bright as to diminish the back light thing I had going on. I tried a speedlight for fill, but even at a low power and bounced, it looked too bright.
We settled on two 2×2 white fome core boards held by clamps. One on each side of the dish. You can see them on the lime as it is reflecting the light sources. The boards were easy to whisk away as we moved into each shot.

Here is a lighting diagram for the shoot:


I kept the shoot running smoothly because of the pre-planning that went into it. Scouting and making sure that we could have the run of that part of the restaurant for a couple of days let the manager know that we were cognizant of his need to keep the restaurant open and doing business.

Having the ingredients for each shot one shoot ahead made the styling go quickly as we weren’t waiting for some special ingredient… it was already there.

Here is another shot from the series:


You can see how different the two shots look. One is very traditional, sort of a menu or recipe look to it. And the other has a more fresh, magazine or editorial feel to it. The heavy back light and angled horizon give it a bit of whimsy.


It is important that the food look appetizing at all times. Letting pasta sit for too long makes it look rubbery, and we were constantly rotating the veggies and other items into the fridge so they would not look old and spoiled. In the end a lot of food was prepared and we gave it to customers or ate it ourselves… not wanting to waste it.

I shot a few shots tethered to get the exposures correct and nail them down. After that initial testing, I went to shooting on the cards. I didn’t want the AD to start picking apart every shot and slowing us down. I knew we had what we needed and would of course ‘chimp’ it to make sure.

Shooting food is a lot of fun. It is demanding and can be crazy fast, but it can also be very rewarding when the images make the chef smile and people want to buy the product.

**More on Don Giannatti's Lighting Essentials workshops below.

Read more >>

Sep 1, 2010

Up-close and Personal with Frank Selmo

Photography by Frank Selmo http://www.yourphotographypro.com//

1) If you could name one defining moment that really sparked your photography fire, what would that be?

[image by Frank Selmo]
"At the age of 10, my father handed me a camera so that I could take some photographs on a school excursion. I wish I could remember the model of the camera, all I remember is that it was a Leica. My father handed me the camera the night before the excursion and asked me to look after it...and I did! For some reason I was in love with this piece of equipment....I also loved the old leather cover it came in too.

On the school bus I was obsessed with my camera....taking photos and learning how to use it....so much so that my friends were annoyed with me. The excursion was to an animal park and I still remember some of the photographs I took and how proud I was of them. Unfortunately I don't know where they are now...in a box in my Mother's basement probably.One photograph was of an eagle cracking open an egg with it's beak. I have to get back to wildlife photography some day".

2) Did you study to become a photographer? If so, where and how long was the program?

"I have been studying all my life to become a photographer....yes I have completed a formal diploma in photography however this is only one piece to the puzzle.

As a child I remember watching people. My parents would ask me to not stare, but I was simply observing human behaviour....at this point in my life I did not know that I would eventually become a photographer and that this observation skill I had refined would come in handy. I believe a good photographer is someone that has the ability to see beyond what the average person sees. A good photographer will anticipate a moment and has the ability to technically capture it. Having taught photography in the TAFE system in Australia, I have come to realize that not everyone has this skill....to see all the detail in a scene, to read people and their personality and not just see it as a subject matter. Every scene has a story.... portrait, landscape, architecture and even still life....there's a story in each of these. What I have been learning to do is to tell that story through one image.

I have also trained as a videographer having completed several film making courses....yes I aspired to be a blockbuster movie producer/director, haven't we all.....no? The courses I completed were with independent film makers that were teaching in order to raise funds to continue their own film making careers.

On top of all that I have trained in graphic design and art. Most of this was on the job with artists, graphic artists and creative mural painters and signwriters....I learned a lot about layout, composition, color etc.

I think the most important thing I've learned, is how to relate to people. 90% of my work is capturing portraits, and that means I must like people and if not then I should!....know how to relax them, entertain them and have fun with them. This is the key to good portrait photography...and this is a skill that you work on all your life....learning to relate and communicate in a way that will give you the greatest results in your photographs. I have developed this skill through social interaction, teaching photography and delivering other motivational courses, but mostly on the job photographing people at weddings. Spend time with children and they will teach you many things that cannot be learned in a classroom".

3) Did anyone, in particular, influence you to become a photographer or influence your work as one?

[image by Frank Selmo]
"I am consistently following other photographers and their careers. I think all photographers can learn from those who have gone before them. Why not learn from their experience? I have recently been impressed with the work of Susan Strippling".

4) In your opinion, what makes a great photograph?

[image by Frank Selmo]
"A great photograph is an image that holds your attention. There are millions if not billions of photographs taken everyday, and the one that tells a story will be the one that makes an impact".

5) Do you have a favorite photograph of all time? (either one of yours or another),,, if so, which one and why?

"I love world war 2 photographs the most. The images from that period capture the essence of the turmoil, hardship, suffering and triumphs. The black and white textures cannot be reproduced even with the most sophisticated technology today. Authentic brilliance in my opinion... Just try it, google images...world war 2".

6) What do you feel are the pros and cons of being a photographer?

[image by Frank Selmo]
"Pros... I love cameras, people, taking photos and editing.
Cons...Photographers work harder and longer hours than people would imagine....oh and the occasional bridezilla!"

7) If you had to classify yourself as a specific kind of photographer, what would that be and why?

"Portrait Photography...specializing in weddings".
Read more >>

Work Flow and Processing

by Amy Leavitt

I always love to hear about how other photographers process their images. I enjoy hearing different ways of doing things - so I thought I'd share my workflow from beginning to end.

**a few notes** I use Photoshop CS4, Adobe Camera Raw, and Adobe Bridge, and I shoot in RAW.

Cull the images. I use Bridge to sort through the whole gallery. Anything I love gets 1 star. I go through it several times to weed out those "just ok" and find the best images from each pose.

I then go through the starred images using Bridge, and color correct in ACR if necessary. The images are then processed using Image Processor in Bridge. It converts the images to JPG and also applies my skin softening action (which uses the Portraiture plug-in). They are then placed in a separate folder within the main gallery folder.  I then edit the images in batches of 6 -10.  Then I crop them to a 5x7 ratio. I try to edit all the images from one sitting or pose for continuity. With three kids, I rarely have time to edit a whole gallery in one sitting, so once a batch of photos are edited, those photos get 3 stars so I know they're done. Here's how I process 90% of my images:

1. I fix any skin issues such as acne, or under eye circles. The best way I have found to fix under eye circles is to use the patch tool, select the dark circle and drag it to a patch of clear skin. Then go to Edit--> Fade Patch Selection, and slide it to around 50-60%. You do NOT want to completely remove the circle because it will look weird. Just soften it a little.

2. Channel Mixer. I LOVE how channel mixer evens out skin tones and seems to fix minor color issues. Image -->Adjustments-->Channel Mixer. Click on the "monochrome" checkbox and set the blending mode to screen, reduce opacity to about 35%. You can play with the adjustment sliders, but I usually go with somewhere around +35 for red, +70 for green and +5 for blue.

3. Soft light layer. Duplicate the background layer by selecting the background layer and hitting Ctrl J (PC) or Command J (Mac). Set the blending mode to soft light and reduce opacity to around 30%.

4. Solid color fill: This seems weird but I love the subtle effect. The blue set at a low opacity gives the photo a subtle haze that I love. At the bottom of the layers panel is a little circle that's half black/half white. Click on it and choose "solid color" at the very top. Pick a muted dark blue. Just trust me on this :) Change the blending mode to "exclusion" and set the opacity to around 20-25%. Exclusion mode basically lowers the contrast slightly and provides a smoothness to the image.

5. Another solid color fill. This one is for warmth in the image. Choose a warm gold color, set the blending mode to "overlay" and reduce opacity to around 20%.


6. High Pass Sharpen. Duplicate the background layer, and choose Filter-->Other-->High Pass. Set the slider so that you just begin to see the edges of the image. I usually set it around 5 or so. Set the blending mode to Overlay and reduce opacity to around 50%.

7. Optional: Select all of the adjustment layers and go to Layers-- >Group Layers. This gives you the control to reduce the opacity of the whole set of steps at once. Some examples of these techniques in action:

Seem like too many steps to do for each image?? No worries! It's easy to create an action that does everything and all you need to do is adjust the sliders of each step to customize each image. That's what I did! The entire effect of my workflow gives my images creamy, smooth skin tones, almost vintage detail of clothing (check out what it does to jeans!), dreamy, hazy backgrounds and an overall pleasing warmth. If I want a hazier feel, I'll lower the opacity of the Soft Light layer and the High Pass layer. If I want stronger contrast, increase those layers. Give it a try! Leave a comment below if you'd like the action and I'll make it available to download on my blog :). Happy editing!
Read more >>

Aug 12, 2010

Project Sharing: Yellowstone National Park


Nestled between three states (Wyoming, Montana, and Idaho), beautiful Yellowstone is America's first national park.  It is the home to a number of exciting wildlife species, including moose, bison, grizzly bears, elk, deer, wolves, and a large variety of birds.


Yellowstone is an active volcano and experiences approximately 2000 earth quakes each year.  It's natural wonders are a sight to behold, with more than 10,000 geysers, hot springs and fumaroles.  Yellowstone is the largest concentration of hydrothermal features in the world.


Being there in person (with a camera) was a dream.  I found it extremely facinating to watch through my lense, this active volcano, spewing forth heat and steam from beneath the earths surface; the process of land formation at its finest, and right before my eyes!  I am in awe of the parks powerful rivers and majestic waterfalls, it's serene mountain grandeur and beautiful lakes.  Yellowstone is a unique glimpse into the work of Mother Nature, that will most definitely take your breath away! 


Read more >>

Aug 5, 2010

Building Strong Client Relationships

by: Jessie Emeric

My husband, Jason, and I have met lots of couples and families since we started Emeric Photography almost 10 years ago and we're proud to say we've become and remained friends with so many of them. Now that's not to say you need to be BFF's with all your clients, but you should work on building a friendly relationship with them. You need to get to know your client. Find out what they like, what they don't like and don't be afraid to ask questions. Think of it as a first date. A first date you want to lead to an engagement session, a wedding day, a trash the dress session, and who knows, they may be calling you when it's time for those newborn and family portraits down the road!  Here are the top 5 "Must Do's" that have worked for us in build strong client relationships.

1. Make a Good First Impression.


Most people want to know the basics during the initial contact, be that via email, phone, or in-person consultation. The usual inquiries are these: What is your fee? What products or packages do you offer? And, are you available for their date? You definitely want to answer their questions directly and honestly, don't be too vague or you may seem shady. You also want to show a personal interest in the them and start earning their trust right away. The most obvious way to do this is by sincerely congratulating them on their engagement, pregnancy, birth of a child, etc. Most people come to us, as photographers, to document these milestones and important events in their lives - it's a pretty big deal for them and you should acknowledge that. Make sure to thank them for their interest in your services and mention how honored you'd be to be a part of their special day.

2. Make them Feel Comfortable


When you meet up with your clients to take their portraits or document their wedding, you don't want to just jump right in and start pointing the camera at them and giving directions on how to pose. Let's go back to that dating scenario, you wouldn't start talking about marriage with someone on a second date, right? So, you start off by complimenting their outfit(s), accessories, shoes, flowers, decor, etc. It helps break the ice and gets them to open up. Plus, you're showing interest and acknowledging the time and effort that went into planning for their session or wedding. Make a little small talk and just keep things casual and relaxed. Keep the conversation fun and light and before you know it they'll start to loosen up and enjoy the experience. Lots of times when photographing a wedding day, I start off by introducing myself to to anyone else in the room and then I start photographing the details and ease my way into some photojournalistic shots and by this time, they are used to me and my camera and I just ease my way into photographing the more formal shots. This method also works great for portrait sessions. When your client trusts you and is comfortable with you, it'll show through in their photographs!

3. Keep your Promises


This part is pretty simple and will help build your credibility. It's like when you're dating someone, you don't want to keep them checking their voice mail every 10 minutes to see if they missed your call, right? Don't keep your clients guessing either. Give them exact dates for when to expect their proofs, online gallery, print orders, etc. and then deliver on your promise. Sometimes things can happen and we can fall behind; this is where having a good relationship with your client can also come in handy. If you've built on that relationship from the beginning, they will be a lot more understanding and sympathetic if you can't meet your deadline due to an illness, the lab sending the wrong order, or any other unforeseen occurrence. 

4. Make It Pretty


Who doesn't like to get something in a pretty package? Giving your girlfriend or boyfriend flowers or a small gift, shows you care about them and makes you look good, too. Making the extra effort and providing your clients with upgraded packaging and presentation for your finished product tells your client you care about them and want to make them happy. It also shows you take pride in your work and gives your business a bump up from the retail photo studio. Adding those personal touches will make a lasting impression and they'll start talking about you to their friends and relatives. Oh, and don't forget to add a "thank you" card!

5. Keep in Touch


This may take a little time and effort, but it's totally worth it. You're ready to take your relationship to the next level, you want them to be clients for life. Getting your client's mailing address, telephone number, and email when they complete the service agreement/contract is super important to keeping in touch. A simple email or post card about your seasonal promotion or new products might be just what they need to schedule another session with you or to pass along that info to someone else. Social media is another great way to keep in touch, but you don't want to abuse it! Don't be pushy or start sending out too many emails or you'll be sure to end up in the SPAM folder. Use social media to your advantage. Become facebook friends with clients or ask them to "like" your facebook page and follow you on twitter. They can also subscribe to your blog or newsletter. Then, post "sneak peeks" from your recent sessions, tag clients in your facebook albums, run promotions and contests every so often. Keep your posts, comments, and updates fun and fresh. Engage your client and make it about them, not just about you. Before you know it, they'll be booking their next session with you and sending you referrals.

Being a professional photographer involves a lot more than just taking a pretty picture. It's also about having fun, making new friends, and capturing true emotions!
Read more >>

Aug 2, 2010

Kids! Kids! Kids!

Tips for photographing KIDDOS!
By: Stacie Hawley

As a photographer I get the pleasure of working with lots of different people - but I have to admit - little children are my favorite!   Full of life and spunk, you can get the most darling pictures of kids- if you know how to work with them!   I was asked to guest post – very exciting – and I decided to share some of my favorite kiddo tips and tricks!  Enjoy!

Get Comfortable - Be personal and genuine – take a few minutes to talk to the kiddos before the shoot.  You can ask a few questions, like “what is your favorite color,” or “what kind of ice cream do you like,” and then share your favorites with them.  Some kids will open up right away, others may be a little more reserved.  I like to show them my camera equipment, and tell them about what I do.  It’s amazing what a little conversation can do to build rapport.  Tailor each session to the child’s individual personality.


Be Patient - Kids are kids and sometimes they just need a break from shooting.  We’ll stop to look at the flowers, chase a butterfly, tell jokes – it doesn’t really matter what we do, because very soon everybody feels better and I can pull my camera back out.  When photographing children PATIENCE is the key.  Helping mom to understand this as well can be challenge, but before we even start the shoot, I try to talk with her about just letting me handle the situations that arise.


Get on Their Level - Become a part of their world.  Kneel, sit, lie down, do somersaults – anything works.  By the end of a session I am always covered in grass stains and dirt.  Ha ha.  This is also a great way to make sure you avoid awkward size distortions that can happen if you’re shooting from too high – sometimes though funky angles can be fun!


Natural Smiles - Embrace natural emotions and smiles – I promise it will be the best thing you ever do!  Child photography isn’t so much about posing, but allowing a child’s personality to shine through.  Photograph the kiddos in their natural environment – let them play.  Let them be themselves!  My favorite pictures are those that show emotion – surprise, joy, introspection, etc.  The key to great photography is to capture the true child. 


Happy Humor - Most kids are at their best when they’re laughing; it’s when the REAL smiles come out.  Children, and child photographers (ha ha), seem to have very silly senses of humor – so anything goes!  The more fun you have together, the better your pictures will be!  Have them come up with a funny name for your camera, tell a silly joke or sing the wrong words to a song, or ask them silly questions to crack them up.  My personal favorite is asking “does your daddy wear diapers?” – it works every time.


Be Quick - Most kids are a bundle of energy.  Have them run around, play pretend (tell the girls to be princesses or the boys to act like superheroes and watch the magic happen), or put on a show for you - once they start going, you have to be right behind them.  Bring low maintenance equipment, use a fast shutter speed, and snap away.  If you’re ready, you’re sure to get those wonderful spontaneous moments and action sequences that can’t be replicated. 


Showcase the Little Things - Parents also want to remember all the little things that will change about their child – their tiny hands, their chubby cheeks, their big eyes, their scrunchy toes, etc.  Get up close and focus in on the little details.  Capturing these will endear your photos to the parents forever.


Child photography can be truly rewarding if you follow these simple tips.  Trust yourself, have fun, and enjoy all those cute kids!
♥ ♥... Stacie
Read more >>

Jul 6, 2010

365 Reasons To Love Photography

Life passes by so quickly and sometimes it's hard to remember what happened yesterday, much less a year ago. When I started Project 365 on January 1st of this year, I began a new journey of taking notice of the things in my life that bring me joy on a daily basis. Whether it was my family, a good book, the beauty in nature, or a well cooked meal, my picture of the day became my reminder that life is good! Capturing one photo every day, has not only given me a visual history of my life and a great way to remember the year, but it has also made me a better photographer in the process!


Project 365:  Why and How [by PhotoJoJo.com]

WHY DO IT?
"Taking a photo a day is a big undertaking with big payoffs. Here are just a few reasons why you should consider doing it:

•Imagine being able to look back at any day of your year and recall what you did, who you met, what you learned… (Often we find it hard to remember what we did just yesterday or even last night, let alone a whole year ago!)

•Your year-long photo album will be an amazing way to document your travels and accomplishments, your haircuts and relationships. Time moves surprisingly fast.

•Taking a photo a day will make you a better photographer. Using your camera every day will help you learn its limits. You will get better at composing your shots, you’ll start to care about lighting, and you’ll become more creative with your photography when you’re forced to come up with something new every single day.

HOW TO DO IT!
1.Bring Your Camera Everywhere.

Yes, everywhere. Get in the habit. Grocery stores, restaurants, parties, work, and school.  Going to a movie theatre? Snap a pic of the flick with your phone–there are photo-ops everywhere. If you have one of those tiny tiny cameras, you have no excuse not to have it in your pocket all the time. And if you don’t? Camera phones are a great substitute.   

2.Make Posting Easy

You can install blog software like Movable Type or WordPress on your own site and create an entry for each photo, but for true ease of use, try a photo sharing site. Flickr will let you post a week’s worth of photos in 2 minutes flat, and fotolog and Photoblog.com are geared toward a photo-a-day workflow.   Making it fast and easy means you’re much more likely to do it.

3.Vary Your Themes

Try to capture the day’s events in a single photo. Perform photographic experiments. Take a photo of someone new you meet, something you ate for the first time, or something you just learned how to do. Take a photo of something that made you smile. And don’t forget to take a photo of yourself at least once a month so you can remember how you’ve changed, too.

4.  Tell a Story

Use your blog entry, or your photo description, to explain what’s going on in each day’s photograph. How good did that dinner taste? What made you want to take a photo of that stranger? It’ll help you remember down the road, and it gives friends following along a better appreciation of why you took the photo you did. You don’t need to write a lot, just enough to add some color.

5.  Don’t Stop, No Matter What

This is perhaps the most important tip of all. You will get tired of taking a photo every single day. Some days, you will consider giving up. Don’t. The end result is worth the effort. Remind yourself why you wanted to do it in first place.  There will be times you’ll think there’s nothing interesting left to take a photo of, and times you’ll think you didn’t do anything exciting enough to take a photo of. There’s always a great photo to be made.  Get out of the house and take a walk. Or stay inside and look around. Take a photo of something important to you. Take a photo of the inside of your house so you can see how your taste has changed over the years. Take a photo of anything, just don’t stop.   (HINT:  It helps if you’ve told your friends about the project and asked them to follow along. Their encouragement will keep you going!)

6.Post early, post often

Plan on going through and posting your photos at least once a week so you don’t get backlogged and feel overwhelmed. Ideally, post every day or two. Again, spend the time up front to make sure it’s quick and easy to post. It’ll make all the difference."
Read more >>

Jul 1, 2010

Learning From A Pro

What is O.C.F. and What Do I Need to Get Started by Ali Hohn


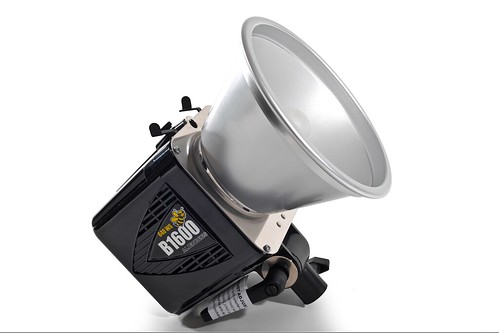
O.C.F:  "What is it? It's using some sort of external light source (speedlite/studio light) outside with you and the sun. You can shoot at pretty much anytime of the day whereas with natural light it's more limiting. I typically use an Alien Bee 1600 light powered by Alien Bees Vagabond and my beauty dish. It took me a while to actually understand how to do Off Camera Flash but you can almost use those same techniques in the studio as well. There are a few more things you change when you are outside. But....Off Camera Flash has changed my life and also my editing time. I don't do very much to my photos anymore. They look incredible straight out of the camera.  Once you get your exposures correctly with O.C.F. it will become a breeze to shoot (other than lugging gear around), but personally, I absolutely love shooting this way!"


Would you like to take your photography to the next level? Don't miss out on Ali's Workshops!More information on O.C.F. photography can be found on her website [http://www.rockthatocf.com/]. She also has an O.C.F. Field Guide and an Online Book to help get you started!

"Just 2 days after buying Ali Hohn's Book on OFF CAMERA FLASH I can see the value in my purchase!" ~Leaha Bourgeois

Ali's One Day Workshop Schedule:
Salt Lake City, Utah September 23-24
Peoria, Illinois October 1-3
California October 22-24
Austin, Texas November 5-7
Read more >>

Give Us Your Best Shot!: O.C.F.

Our first ever Photo Challenge:  Which one is YOUR favorite?? 
We asked Ali Hohn to have some of her best students share their O.C.F. Masterpieces with us, and we were not disappointed!  Submissions are still being accepted until July 7th.  Everyone is welcome to join in on this Photo Challege even if you are not a student!  If you would like to be featured this month, all you need to do is share your talent with us!  [send to bryceandcindy@hotmail.com]. All submissions will be published here, along with your photography website!! What a great way to network and share your work!  Stay tuned for more fabulous shots! 

Challenge Rules:
1.  Image must be O.C.F.
2.  Please send us your name and web address
3.  Photo's will be resized to approximately 600 x 800 pixels and 300 dpi


Read more >>

Jun 25, 2010

Shalimar Studios Presents...

Raj & Sumera by photographer Yasmin Tajik

"My heart is singing. Not just because I witnessed and photographed a wedding, but because it was an Indian Sikh wedding. And I was asked and honored to be chosen to shoot the wedding with my dear friend and fellow photographer Ruby. Both Ruby and I come from Middle Eastern families so when we were presented the opportunity to put our photography skills to work for a project that pays homage to our cultures, it took on a different meaning for us. We understand the language, the culture, and the traditions. But the most joyful part of being at this amazing event, is sharing it with others. 
I wish I could recount every detail for you so that you can understand the culture and traditions, but that would take far too long. Instead, please enjoy the images below of some of the work that I am most proud of".  ~Yasmin Tajik


[To see more images from Yasmin please visit Shalimar Studios].
Read more >>

Jun 22, 2010

O.C.F. Submissions For July


[Photo by Cindy Larkin]

July is going to be a very exciting month!  Stay tuned for more on Ali Hohn our Featured Photographer and O.C.F. guru, plus a first ever Photo Challenge called "Give Us Your Best Shot-O.C.F." We are looking for your O.C.F. Masterpieces! Submissions are being collected now, and will be posted after July 1st.  If you would like to be featured in July's Photo Challenge please send your submissions to bryceandcindy@hotmail.com. All submissions will be published along with your photography website!! What a great way to network and share your work! Can't wait!


Rules:
1.  One submission only please
2.  Please send us your name and web address
3.  Photo's will be resized to approximately 600 x 800 pixels and 300 dpi
Read more >>

10 Simple Yet Effective Photography Tips

by Andy Templeton
[For Beginners or a refresher for the Pros]

1. Move closer to your subject. Nothing kills a photo quicker than a distracting background. If you have a great background try bringing the subject closer to the camera so they don’t get lost. Remember this tip if nothing else.

2. Take lots of pictures. Digital photography is cheap and it is good! It is okay to shoot multiple photos with only slight variations…keep and share your best photos. Also you don’t need an expensive camera; I have photos from all over the world hanging on my walls that were taken with a $300 point and shoot.

3. Get creative. It doesn’t take much to enhance a photo. Pictures taken from 5 ½’ above the ground can look repetitious. Think about changing the perspective – get down on one knee or on your stomach if possible. Stand on a chair. Experiment with different lenses if you have them. Experiment with composition.

4. Rent equipment. Professional camera stores are not just for professionals. They have rental departments where anyone can pick up an exotic lens for a day or more. Many that can be used on non-professional cameras. These rental departments are manned by people with lots of photo knowledge and people are generally more than happy to “talk photography” if not too busy at the moment. Don’t be shy.

5. Use the camera’s flash. Especially outside. Your eyes can look at a person in front of a sunset and see their smile but your camera can’t. It is either going to record the colors of the sunset and your subject will be a silhouette or your subject will be visible and the background will be overexposed. Be conscious of shadows on people’s faces – again utilize your flash. If your subject is looking into the sun they are squinting – turn them away from the sun and fill shadows with flash.

6. Think of your camera like a painter’s canvas. Be the artist. Is there a garbage can or other unwanted item in the frame that can be eliminated by simply moving a foot or so to the left or right? Look at the entire frame you are about to capture, not just the one main element you are focusing on. Sure you can fix it in Photoshop but it is better to capture it the way you want to see it.

7. Study Pictures. Pictures you like. Cut them out of your favorite magazines or newspapers. Keep a file on your desk and just take a moment to look at them and tell yourself what you like about them. Bookmark web sites that have photos you like. Go to them often. Develop your eye.

Oh, and move closer to your subject

8. Learn to take a little criticism. All photographers love their own photos. You put your heart and soul into them. You want to show them off. They are pictures of your kids, taken with the camera you always wanted and just bought. How can people not love them? Remember art is subjective. Not everybody is your mom.

9. Get your pictures published. Local newspapers have photography contests, generally centered on a theme: children, pets, travel. If you are in the right place at the right time, CNN might be interested. Don’t forget about the internet. There are always photo contests you can enter online. Publish your own website. There are plenty of free sites that will allow you to build a web site using your photos. They are a great way to share our art and these days you don’t need a degree from MIT to do it.

10. Learn from your mistakes. But don’t be afraid to break rules. Photography is fun and creative. Nobody is going to die if your snapshots are a little off or weird. What might not work one day may be a stroke of genius the next.

And one last time, move closer to your subject.

For the amateur photographer, these are ten easy, non-technical tips to help you improve the quality of your photos. While there are many technical aspects of photography, great pictures usually begin with a confident photographer who has learned to master composition before worrying about F-Stops.

About the Author
Andy Templeton is a professional photographer located in Orange County, CA. Andy specializes in editorial, public relations and corporate photography. Find his site at http://atempletonphoto.com/ to see his photography, access articles on leveraging images to enhance your business or access his photography blog.
Read more >>

Jun 3, 2010

Advanced Flash

Advanced Lighting Class by Michael Willems

"One of North America’s most experienced photography teachers, pro photographer and flash guru Michael Willems is coming to Las Vegas on July 12 and 13, 2010 to get you up-to-date, with this new workshop aimed specifically at established and emerging pros who want a 'flash' refresher." For more information click here. "I took Michael's Advanced Lighting class in Phoenix last year and it was great!" ~Yasmin Tajik
Read more >>